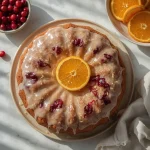
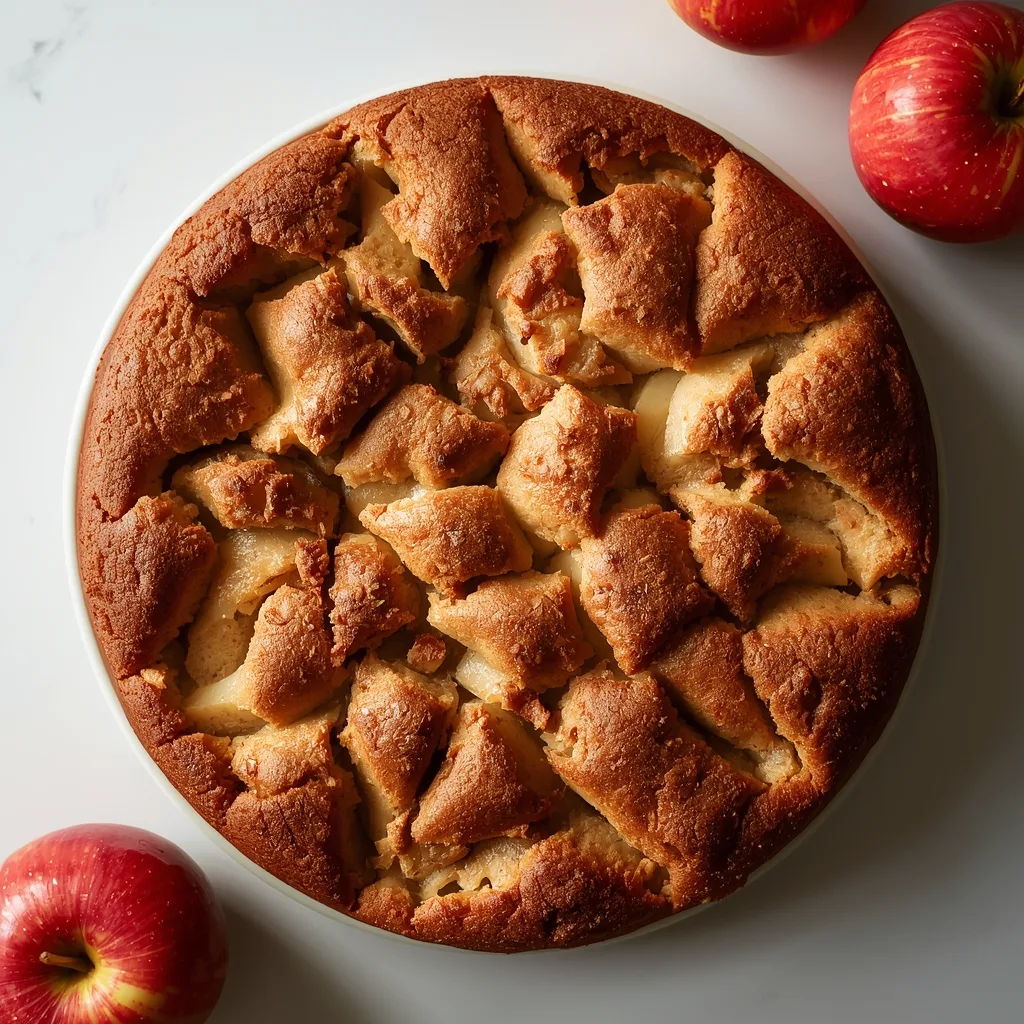
There’s a certain kind of cake that feels like a warm hug, and the Barefoot Contessa Apple Cake is exactly that. This classic, rustic dessert is packed with tender chunks of tart Granny Smith apples and warm cinnamon, all wrapped in a moist, dense crumb. It’s the kind of simple, satisfying bake that’s perfect for a casual afternoon tea or a comforting dessert with a dollop of whipped cream, ready in just about 80 minutes from start to finish.
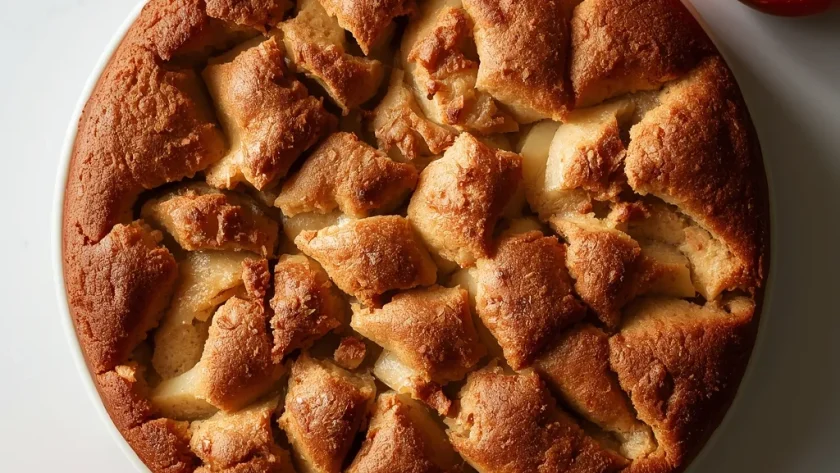
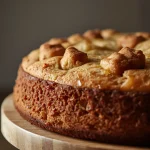
What I love most is its unpretentious nature. It’s a straightforward American dessert that relies on good technique and quality ingredients rather than fussy decoration. The top bakes to a beautiful golden brown with a slightly crisp edge, making it as lovely to look at as it is to eat. It’s a testament to how a few humble ingredients can create something truly special.
Barefoot Contessa Apple Cake Overview
This apple cake is a hallmark of Ina Garten’s approachable, elegant style of home cooking. It’s a rustic, single-layer cake that celebrates the fruit at its core. The magic lies in the method: macerating the apples with sugar and cinnamon before folding them into a rich sour cream batter.
This step is crucial. It draws out the apples’ natural juices, which then bake into the cake, ensuring every bite is incredibly moist. The result is a beautifully textured teatime cake that feels both indulgent and homey. It’s the kind of recipe you’ll return to every autumn, but honestly, it’s welcome any time of year.
Why This Recipe is Worth Trying
With so many apple desserts out there, here’s why this one deserves a spot in your rotation.
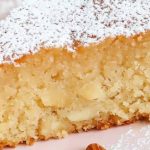
- Incredibly Moist Texture — The combination of sour cream and the juices from the macerated apples guarantees a tender, dense crumb that stays fresh for days.
- Perfect Apple-to-Cake Ratio — You get a generous amount of fruit in every slice, making it feel substantial and satisfying rather than just a plain sponge.
- Simple, Accessible Ingredients — You likely have most of the pantry staples already, and the star ingredient is just a few Granny Smith apples.
- Foolproof Method — The steps are clear and logical, from creaming butter and sugar to gently folding, making it a great project for bakers of all levels.
- Versatile Serving Options — It’s equally delicious warm from the oven, at room temperature, or even lightly toasted the next day for breakfast.
- Impressive Yet Unfussy — Its rustic, craggy top dusted with cinnamon sugar looks beautiful on any table without requiring any decorating skills.
Ingredients You’ll Need for This Recipe
Gathering your mise en place makes the process smooth. Here’s what you need, broken down by purpose.
For the Apples
- 3 medium Granny Smith apples — Their tartness balances the sweet cake batter perfectly. Peel and cut them into 3/4-inch chunks for the best texture.
- 1 tablespoon fresh lemon juice — This prevents the apples from browning while they macerate and adds a subtle, bright note.
- 1 teaspoon ground cinnamon — The classic warm spice that makes the apple filling so comforting.
- 1/4 cup granulated sugar — Drawing out the apple juices is key for moisture, and this sugar helps the process along.
For the Cake Batter
- 1 3/4 cups all-purpose flour — Spoon and level it into your measuring cup for accuracy; too much flour makes a dry cake.
- 1 teaspoon baking powder & 1/2 teaspoon baking soda — This dual-leavening system gives the dense batter a reliable, tender rise.
- 1/2 teaspoon fine sea salt — Enhances all the other flavors. I prefer fine sea salt for its even distribution.
- 1/2 cup unsalted butter, room temperature — Softened butter creams properly with sugar, creating essential air pockets for structure.
- 3/4 cup granulated sugar — Sweetens the batter and, when creamed with butter, provides the cake’s foundational texture.
- 2 large eggs, room temperature — They incorporate more easily into the creamed butter, helping to create an emulsion.
- 1 teaspoon pure vanilla extract — Use the real stuff for the best flavor that complements the apples.
- 1/2 cup full-fat sour cream, room temperature — The secret weapon for incredible moisture and a slight tang. Full-fat is non-negotiable here.
For the Topping
- 1 tablespoon granulated sugar & 1/4 teaspoon ground cinnamon — A simple sprinkle that creates a delightful, slightly crisp top with extra spice.
Useful Equipment
You don’t need anything fancy, but a few key tools make the job easier.
- 9-inch Round Cake Pan — The ideal size for the batter to bake evenly without overflowing. A springform pan works too.
- Stand Mixer or Hand Mixer — Essential for properly creaming the butter and sugar to a pale, fluffy state. You can use a sturdy whisk and arm power, but it’s a workout.
- Flexible Spatula — For scraping the bowl clean and gently folding the hefty apple chunks into the thick batter.
- Medium Mixing Bowls — You’ll need one for the dry ingredients and another for tossing the apples.
- Wire Cooling Rack — Crucial for letting the cake cool completely, which sets the structure and prevents a gummy texture.
Steps to Make Barefoot Contessa Apple Cake
Follow these steps in order for the best results. Patience during cooling is just as important as the baking itself.
- Prep Your Pan and Oven — Preheat your oven to 350°F / 177°C. Generously grease a 9-inch round pan, line the bottom with parchment paper, and grease the parchment. This guarantees a clean release.
- Macerate the Apples — Toss the apple chunks with lemon juice, then with the 1/4 cup sugar and 1 teaspoon cinnamon. Set them aside; you’ll see juices pool in the bowl, which is exactly what you want.
- Combine Dry Ingredients — Whisk the flour, baking powder, baking soda, and salt together in a bowl. This aerates the flour and evenly distributes the leaveners.
- Cream Butter and Sugar — In a stand mixer, beat the softened butter and 3/4 cup sugar on medium-high for 3-4 minutes until pale and fluffy. Scrape the bowl halfway through.
- Incorporate Eggs and Vanilla — With the mixer on medium-low, add the eggs one at a time, beating fully after each. Scrape the bowl, then mix in the vanilla.
- Alternate Wet and Dry — With the mixer on low, add half the flour mixture until just combined. Add all the sour cream, mix, then add the remaining flour. Stop as soon as no dry streaks remain.
- Fold in the Apples — Use a spatula to gently fold the apples and all their juices into the batter. It will be very thick and chunky.
- Bake with Topping — Spread the batter into the pan. Mix the topping sugar and cinnamon, and sprinkle it over. Bake on the center rack for 50-60 minutes.
- Test for Doneness — The cake is done when the top is golden brown, edges pull away, and a toothpick inserted into the cake (not an apple) comes out clean. Tent with foil if the top browns too fast.
- Cool Completely — Let the cake cool in the pan on a rack for 20 minutes. Then, run a knife around the edge, invert it, remove the parchment, and flip it right-side-up to cool fully (about 2 hours).
What Went Wrong and How I Fixed It
I’ve made my share of mistakes with this cake. Here’s what can go awry and how to prevent it.
- Dense, Tough Crumb — Overmixing the batter after adding the flour develops gluten. Mix on low speed and stop the moment the flour is incorporated.
- Soggy Bottom or Center — Underbaking is the usual culprit. Use a toothpick test in a few spots, avoiding apple chunks, to ensure it’s fully cooked.
- Apples Sunk to the Bottom — If your batter is too thin, the chunks will sink. A thick batter from proper creaming and measured flour helps suspend them.
- Dry Cake Texture — Over-measuring the flour is a common error. Always spoon flour into your measuring cup and level it off with a knife.
- Butter and Sugar Didn’t Cream — Using cold butter won’t incorporate air. Your butter should be soft enough that your finger leaves a clear indent.
- Top Browned Too Quickly — Ovens can run hot. If the top is dark golden brown before the center is set, loosely tent the pan with aluminum foil.
Ways to Make Barefoot Contessa Apple Cake Healthier
If you’re looking for a slightly lighter version, these swaps can help. Expect some texture changes, but the flavor will still be wonderful.
- Reduce Refined Sugar — You can cut the granulated sugar in the batter by 1/4 cup. The apples and topping will still provide plenty of sweetness.
- Try Whole Wheat Flour — Substitute half of the all-purpose flour with whole wheat pastry flour for a fiber boost and nuttier flavor.
- Use Greek Yogurt — Swap the full-fat sour cream for an equal amount of plain, full-fat Greek yogurt to lower the fat content slightly while keeping moisture.
- Incorporate Nuts or Oats — Fold in 1/2 cup of chopped walnuts or pecans, or sprinkle rolled oats with the cinnamon sugar topping for added texture and nutrients.
- Boost with Spices — Add a pinch of nutmeg or cardamom to the apple mixture for more complexity without adding calories.
Alternative Ingredients for Barefoot Contessa Apple Cake
Out of something? These tested swaps will save your bake.
- Granny Smith Apples → Other Tart Apples — Honeycrisp, Braeburn, or Pink Lady apples will work, though their varying sweetness and texture will change the final result slightly.
- Sour Cream → Plain Yogurt or Buttermilk — Use an equal amount of full-fat plain yogurt or buttermilk. The tang and moisture content are similar.
- All-Purpose Flour → Gluten-Free 1:1 Blend — Use a trusted brand like Bob’s Red Mill. The texture may be slightly more crumbly but still delicious.
- Granulated Sugar → Light Brown Sugar — You can replace up to half of the granulated sugar in the batter with light brown sugar for a deeper, molasses-like flavor.
- Unsalted Butter → Salted Butter — If using salted butter, simply omit the 1/2 teaspoon of fine sea salt from the batter.
- Vanilla Extract → Almond Extract — Use just 1/2 teaspoon of almond extract for a different, lovely flavor pairing with the apples.
What to Serve With Barefoot Contessa Apple Cake
This cake is a star on its own, but a few accompaniments can make it a full dessert experience.
- Vanilla Ice Cream — The classic pairing. A scoop of cold, creamy ice cream melting over a warm slice is pure bliss.
- Freshly Whipped Cream — Lightly sweetened whipped cream adds a cloud-like texture that complements the dense cake beautifully.
- Warm Caramel Sauce — Drizzle a homemade or good-quality store-bought caramel sauce for a decadent, buttery enhancement.
- Sharp Cheddar Cheese — An old-fashioned pairing. A thin slice of sharp cheddar alongside a piece of cake creates a fantastic sweet-and-salty contrast.
- Hot Coffee or Tea — A cup of strong coffee or a pot of Earl Grey tea is the perfect beverage to cut through the sweetness and cleanse the palate.
- Apple Cider — Serve warm spiced apple cider on the side to double down on the cozy autumn flavors.
Best Tips for Barefoot Contessa Apple Cake
These are the little things I’ve learned over the years that make a big difference.
- Room Temperature is Key — Let your eggs, butter, and sour cream sit out for an hour. They emulsify better, creating a smoother, more uniform batter.
- Don’t Skip Macerating — Letting the apples sit with sugar and cinnamon isn’t just for flavor; the released juices are vital for the cake’s moisture.
- Measure Flour Correctly — The most common baking error. Fluff your flour, spoon it into the cup, and level it off. Don’t scoop directly from the bag.
- Fold Gently at the End — When adding the apples, use a folding motion with a spatula to maintain the batter’s airiness and avoid crushing the fruit.
- Test in Multiple Spots — When checking for doneness, insert your toothpick in a few places to avoid a hidden pocket of wet batter near an apple chunk.
- Patience During Cooling — Letting the cake cool completely in the pan and then on a rack is non-negotiable for a set structure and clean slices.
- Use a Serrated Knife — For the cleanest cuts through the apples and tender crumb, use a gentle sawing motion with a serrated bread knife.
Unique Takes on Barefoot Contessa Apple Cake
Once you’ve mastered the classic, try these fun twists for a different experience.
- Add a Streusel Topping — Replace the cinnamon-sugar sprinkle with a buttery crumb topping made from flour, brown sugar, cinnamon, and cold butter.
- Make it a Bundt Cake — Double the recipe and bake it in a well-greased Bundt pan for about 60-70 minutes. It makes a stunning centerpiece.
- Incorporate Dried Fruit — Fold 1/2 cup of plumped raisins, cranberries, or chopped dried apricots in with the apples for extra pops of flavor.
- Infuse with Citrus Zest — Add the zest of one orange or lemon to the batter along with the vanilla for a bright, aromatic lift.
- Create a Salted Caramel Glaze — After the cake cools, drizzle it with a simple glaze made from powdered sugar, milk, and a pinch of sea salt.
- Try a Different Spice Blend — Experiment with apple pie spice or add a pinch of ginger or allspice to the cinnamon for a more complex warmth.
How to Store Barefoot Contessa Apple Cake
Proper storage keeps this moist cake tasting its best for days.
- Room Temperature (Short-Term) — Once completely cool, wrap the cake tightly in plastic wrap or store in an airtight container. It will stay fresh for up to 2 days.
- Refrigeration (Longer-Term) — For storage up to 5 days, keep it in an airtight container in the refrigerator. The cold will firm up the texture slightly.
- Freezing for Later — Wrap the completely cooled cake tightly in plastic wrap, then a layer of aluminum foil. Freeze for up to 3 months.
- Thawing Frozen Cake — For best results, thaw the wrapped cake overnight in the refrigerator before bringing it to room temperature or reheating.
- Pre-Slice Before Freezing — Consider slicing the cake before freezing and separating slices with parchment. This lets you thaw just one piece at a time.
How to Reheat Barefoot Contessa Apple Cake
A quick warm-up brings back that fresh-from-the-oven magic.
- Oven Method (Best Texture) — Preheat your oven to 300°F / 149°C. Place slices on a baking sheet for 8-10 minutes, until warmed through. This revives the crisp edge.
- Toaster Oven Convenience — Use the same low-temperature setting as your regular oven. Watch it closely, as it can heat faster.
- Microwave Method (Fast) — Microwave a single slice on a plate for 15-20 seconds on medium power. It will soften the cake significantly, but it is very quick.
- Skillet Warming — For a unique approach, warm a slice in a dry, non-stick skillet over low heat for a minute or two per side to lightly toast the exterior.
FAQs
Can I make Barefoot Contessa Apple Cake ahead of time?
Absolutely. Bake and cool the cake completely, then wrap it tightly. It tastes even better the next day as the flavors meld. You can store it at room temperature for up to two days.
Why did my apples sink to the bottom of the cake?
This usually happens if the batter is too thin. Ensure your butter and sugar are properly creamed to a fluffy state, and measure your flour accurately to create a thick batter that can support the apple chunks.
Can I freeze Barefoot Contessa Apple Cake?
Yes, freezing works very well. Wrap the completely cooled cake tightly in plastic wrap and then foil. It will keep for up to 3 months. Thaw overnight in the fridge.
What’s the best apple to use besides Granny Smith?
You want an apple that holds its shape and offers some tartness. Honeycrisp, Braeburn, or Jonagold are excellent alternatives. Avoid very soft apples like Red Delicious.
How long does Barefoot Contessa Apple Cake last in the fridge?
Stored in an airtight container, it will stay fresh for about 5 days in the refrigerator. Let a chilled slice come to room temperature or warm it slightly for the best texture.
My cake is browning too fast on top. What should I do?
Ovens have hot spots. If the top is becoming deep brown before the center is set, loosely tent the pan with a sheet of aluminum foil for the remainder of the baking time.
Nutritional Breakdown (Per Serving)
Based on 1 serving = 1 slice out of 4 total slices from this recipe.
- Calories: 685
- Protein: about 9g
- Fat: 28g
- Carbohydrates: 102g
- Fiber: 4g
- Sugar: around 65g
- Sodium: 480mg
Try These Recipes
- Ina Garten Apple Crisp
- Ina Garten Chocolate Chunk Blondies
- Ina Garten Peach Raspberry Crisp
- Ina Garten-Inspired Sweet Potato Pie
Conclusion
This cake is a testament to the beauty of simple, well-executed baking. It’s forgiving for beginners yet satisfying for experienced bakers, and it fills your kitchen with the most wonderful aroma. I hope this guide gives you the confidence to bake the Barefoot Contessa Apple Cake and make it your own. Once you try that first moist, spiced slice, I think you’ll understand why it’s become such a beloved classic.
PrintBarefoot Contessa Apple Cake
This classic, rustic apple cake features a moist, dense crumb packed with warm cinnamon and tender chunks of tart Granny Smith apples. The top bakes to a beautiful golden brown with a slightly crisp edge, making it perfect for afternoon tea or dessert with a dollop of whipped cream.
- Prep Time: 25
- Cook Time: 55
- Total Time: 80
- Yield: 4 1x
- Category: Dessert
- Method: Baking
- Cuisine: American
Ingredients
- For the Apples: 3 medium Granny Smith apples (about 1 1/2 lbs / 680g), peeled, cored, and cut into 3/4-inch chunks
- 1 tablespoon fresh lemon juice
- 1 teaspoon ground cinnamon
- 1/4 cup granulated sugar
- For the Cake Batter: 1 3/4 cups all-purpose flour, spooned and leveled
- 1 teaspoon baking powder
- 1/2 teaspoon baking soda
- 1/2 teaspoon fine sea salt
- 1/2 cup unsalted butter, at room temperature (1 stick / 113g)
- 3/4 cup granulated sugar
- 2 large eggs, at room temperature
- 1 teaspoon pure vanilla extract
- 1/2 cup full-fat sour cream, at room temperature
- For the Topping: 1 tablespoon granulated sugar
- 1/4 teaspoon ground cinnamon
Instructions
- Preheat your oven to 350°F / 177°C. Generously grease a 9-inch round cake pan with butter, then line the bottom with a parchment paper round and grease the parchment. This ensures the cake releases cleanly without sticking to the pan.
- Prepare the apples: In a medium bowl, toss the apple chunks with the lemon juice to prevent browning. Add the 1/4 cup sugar and 1 teaspoon cinnamon, and toss until evenly coated. Set aside to macerate while you prepare the batter; this draws out some of the apple juices which will keep the cake moist.
- Whisk the dry ingredients: In another medium bowl, whisk together the flour, baking powder, baking soda, and salt until thoroughly combined. Aerating the flour and evenly distributing the leaveners is crucial for a uniform rise and tender crumb.
- Cream the butter and sugar: In the bowl of a stand mixer fitted with the paddle attachment, beat the softened butter and 3/4 cup sugar on medium-high speed for 3-4 minutes, until pale, fluffy, and light in texture. Scrape down the bowl halfway through. Proper creaming incorporates air, which is essential for the cake’s structure.
- Add the eggs and vanilla: With the mixer on medium-low, add the eggs one at a time, beating until fully incorporated after each addition. Scrape the bowl, then beat in the vanilla extract. Adding eggs slowly prevents the batter from breaking or curdling.
- Combine wet and dry ingredients: Reduce the mixer speed to low. Add half of the flour mixture and mix until just combined. Add all of the sour cream and mix until nearly combined, then add the remaining flour mixture. Mix just until no dry streaks remain; overmixing at this stage will develop gluten and make the cake tough.
- Fold in the apples: Using a flexible spatula, gently fold the macerated apples and any accumulated juices into the batter until evenly distributed. The batter will be very thick and chunky with apples, which is correct.
- Bake the cake: Transfer the batter to the prepared pan and spread it into an even layer. For the topping, mix the remaining 1 tablespoon sugar and 1/4 teaspoon cinnamon in a small bowl, then sprinkle evenly over the batter. Bake on the center rack for 50-60 minutes.
- Check for doneness: The cake is done when the top is deeply golden brown, the edges pull slightly away from the pan, and a toothpick or cake tester inserted into the center (avoiding an apple chunk) comes out clean or with a few moist crumbs. If the top browns too quickly, tent loosely with aluminum foil.
- Cool completely: Let the cake cool in the pan on a wire rack for 20 minutes. This allows the structure to set so it doesn’t collapse. Then, run a thin knife around the edge, invert the cake onto the rack, remove the parchment, and carefully flip it right-side-up to cool completely, about 2 hours. Cooling is non-negotiable for clean slicing.
Notes
Storage: Store cooled cake, tightly wrapped in plastic wrap or in an airtight container, at room temperature for up to 2 days. For longer storage, refrigerate for up to 5 days. Freezing: Wrap the completely cooled cake tightly in plastic wrap, then in aluminum foil. Freeze for up to 3 months. Thaw overnight in the refrigerator. Reheating: For best texture, warm individual slices in a 300°F / 149°C oven for 8-10 minutes until heated through. A microwave will soften the texture but can be used for 15-20 seconds on medium power.
Nutrition
- Calories: 685
- Sugar: 65g
- Sodium: 480mg
- Unsaturated Fat: 16g
- Carbohydrates: 102g
- Fiber: 4g
- Protein: 9g
- Cholesterol: 145mg
Keywords: barefoot contessa apple cake, ina garten apple cake, rustic apple cake, cinnamon apple cake, easy apple dessert, moist apple cake, granny smith apple cake, fall baking, tea cake, weekend dessert