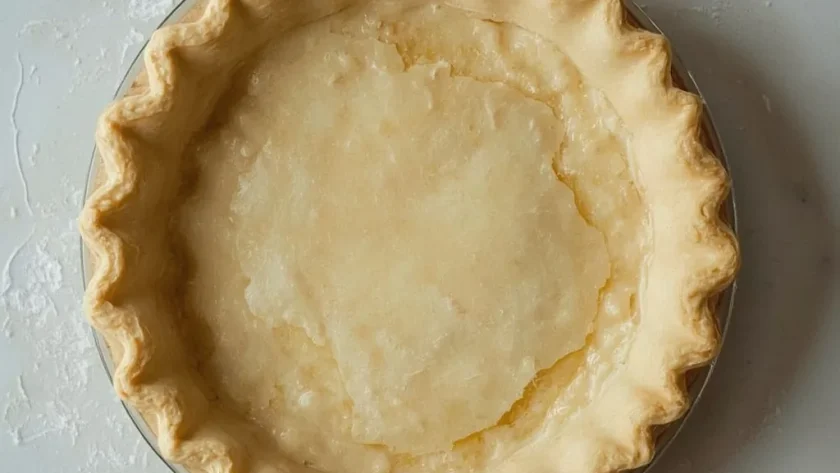
I love a good, reliable pie crust recipe. The Ina Garten Pie Crust is exactly that — a classic, foolproof pastry that bakes up golden, flaky, and wonderfully tender. It is simple to put together, but the results taste like you spent hours in the kitchen.
From start to finish, you will need about 15 minutes of active prep time, then at least 4 hours of chilling, plus 35 to 45 minutes of baking. The total time (including chilling) comes to about 7 hours, but most of that is inactive. This recipe is a solid intermediate level, mostly because of the blind baking step, but it is totally doable for a confident beginner.
Ina Garten Pie Crust Overview
This is the kind of crust that makes you want to bake more pies. It relies on a clever combination of cold butter and cold vegetable shortening, plus a splash of apple cider vinegar. The vinegar does a specific job here: it inhibits gluten formation, which keeps the pastry from turning tough or chewy.
The method is straightforward, using a food processor to keep everything icy cold. You pulse the fats into the flour until you see pea-sized bits remaining, then add the ice water and vinegar. The result is a dough that rolls out smoothly and bakes up with distinct, flaky layers.
Whether you are filling it with a sweet fruit filling, a rich chocolate cream, or a savory quiche, this crust holds up beautifully. It works for both sweet and savory pies, which makes it a real workhorse in the kitchen.
Why This Recipe is Worth Trying
There are plenty of pie crust recipes out there, but this one stands out for several good reasons. Here is why it has earned a permanent spot in my rotation:
- Foolproof Method — The food processor does the heavy lifting, ensuring the fat stays cold and the dough comes together quickly without overworking it.
- Flaky, Not Tough — The combination of butter and shortening gives you both flavor and texture, while the vinegar keeps the gluten relaxed.
- Versatile Base — It works equally well for sweet pies, savory pot pies, and even tartlets. You can use it for nearly any filling.
- Make-Ahead Friendly — The unbaked dough keeps in the fridge for up to 3 days or in the freezer for 3 months. That makes holiday prep a breeze.
- Consistent Results — I have made this crust dozens of times, and it turns out the same way every single time. No surprises.
- Clear Instructions — The recipe gives you exact cues, like when to stop pulsing and how to tell the dough is ready. That takes the guesswork out of it.
Ingredients You’ll Need for This Recipe
You only need six basic ingredients, and chances are you already have most of them. Here is what each one does and what to look for when buying them.
Base Ingredients
- 1 1/4 cups all-purpose flour, plus more for dusting — All-purpose flour gives the crust structure without being too dense. You want a standard brand, not bread flour or cake flour, for the right balance of tenderness and stability.
- 1/4 teaspoon kosher salt — Salt seasons the dough and helps balance the richness of the fats. If you use table salt, reduce it to 1/8 teaspoon to avoid over-salting.
Fats
- 1/2 cup (1 stick) cold unsalted butter, diced into 1/2-inch cubes — Butter provides rich flavor and creates steam pockets that form flaky layers. Keep it very cold — straight from the fridge — and dice it just before using.
- 1/4 cup cold vegetable shortening, diced into 1/2-inch cubes — Shortening adds tenderness and prevents the crust from shrinking. It has a higher melting point than butter, which helps maintain flakiness during baking.
Liquid
- 3 tablespoons ice water — Cold water hydrates the flour without warming the fat. The ice ensures the water stays near freezing, which is critical for keeping the butter and shortening solid.
- 1 tablespoon apple cider vinegar — Vinegar inhibits gluten development, making the crust more tender and easier to roll out. Do not skip it — it makes a real difference in texture.
Useful Equipment
Having the right tools makes the process smoother and helps you avoid common pitfalls. Here is what you will need:
- Food Processor (fitted with steel blade) — This is the most efficient way to cut cold fat into flour without warming it up. A pastry blender works in a pinch, but the processor is faster and more consistent.
- Bench Scraper — Great for lifting sticky dough off the work surface and for dividing dough into portions. It also helps you transfer the rolled dough to the pie plate without tearing.
- Rolling Pin — A standard wooden or marble rolling pin works perfectly. If you use a French-style tapered pin, it gives you more control over thickness.
- 9-inch Pie Plate — A standard metal or ceramic pie plate works well. Glass plates let you see the bottom browning, which is helpful for judging doneness.
- Parchment Paper and Pie Weights — For blind baking, parchment paper keeps the weights from sticking, and the weights (or dried beans) hold the crust in place so it does not puff up.
Steps to Make Ina Garten Pie Crust
The process is straightforward, but a few details matter. Follow these steps exactly for the best results.
- Combine Dry Ingredients — Place 1 1/4 cups all-purpose flour and 1/4 teaspoon kosher salt in the food processor. Pulse 3 to 4 times to combine and aerate the flour — this ensures even salt distribution and a lighter texture.
- Add the Fats — Add the cold diced butter and cold diced shortening. Pulse 8 to 10 times, only until the mixture resembles coarse meal with some pea-sized butter pieces remaining. Do not over-process; those visible fat pieces create steam pockets during baking for flaky layers.
- Add the Liquid — Combine 3 tablespoons ice water with 1 tablespoon apple cider vinegar in a small bowl. With the processor running, pour the mixture through the feed tube in a steady stream and process just until the dough begins to clump together, about 10 seconds. It should hold together when pinched but not form a ball.
- Shape the Dough — Turn the dough out onto a generously floured surface. Gently gather it into a 5-inch disc, incorporating any dry bits with a bench scraper. Do not knead — overworking develops gluten and toughens the crust. Wrap the disc tightly in plastic wrap and refrigerate for at least 4 hours, or overnight.
- Preheat and Prepare — When ready to roll, preheat the oven to 375°F / 190°C. If the dough has chilled longer than 4 hours, let it sit at room temperature for 10 minutes to soften slightly for easier rolling.
- Roll Out the Dough — On a lightly floured surface, dust a rolling pin with flour. Roll from the center outward, rotating the disc a quarter-turn after each roll to maintain a round shape. Continue until the dough is about 12 inches in diameter and 1/8 inch thick. If it sticks, lift it gently with a bench scraper and add more flour underneath — tearing can cause shrinkage.
- Transfer to Pie Plate — Roll the dough loosely around the rolling pin, then unroll it over the pie plate. Gently press into the bottom and up the sides without stretching. Trim the overhang to 1 inch beyond the rim, then fold the excess under to form a thick edge. Crimp using your fingers or fork tines.
- Blind Bake the Crust — Line the dough with parchment paper (shiny side down) and fill with pie weights or dried beans. Bake at 375°F / 190°C for 20 minutes until edges begin to turn pale gold.
- Finish Baking — Carefully remove the parchment and weights. Prick the bottom with a fork in several places to prevent air bubbles. Bake for another 15 to 20 minutes until golden brown and dry to the touch. If edges brown too quickly, tent with foil.
- Cool Completely — Cool the baked crust in the pie plate on a wire rack before filling. For fillings that need more baking (custards, fruit pies), the crust may be partially baked or filled raw per the recipe instructions. This technique provides a fully baked shell for no-bake fillings.
What Went Wrong and How I Fixed It
Even with a great recipe, things can go sideways. Here are the most common issues I have run into and how to fix them.
- Dough was too crumbly to roll — This usually means the dough is too dry or the fat was over-processed. Next time, add water a teaspoon at a time until the dough holds together when pinched. For now, sprinkle a little extra ice water over the crumbs and gently press them together.
- Shrinking during baking — Overworking the dough develops gluten, which causes shrinkage. Stretching the dough when fitting it into the pie plate has the same effect. For best results, relax the dough when shaping and avoid pulling or tugging.
- Soggy bottom crust — This happens when the filling is too wet or the crust is under-baked. Blind bake the crust fully before adding a no-bake filling, or use a thickener like cornstarch in fruit pies to reduce excess liquid.
- Crust cracked while rolling — The dough was either too cold or too dry. Let it sit at room temperature for 5 to 10 minutes to warm slightly. If it is still dry, add a small amount of water and press the cracks together gently.
- Butter melted before baking — Warm hands, a warm kitchen, or overworking the dough can melt the butter. Keep everything cold — chill the flour and fats if needed — and work quickly. If the dough feels soft, pop it back in the fridge for 15 minutes.
- Edges browned before the bottom was done — Oven temperatures vary, so the edges can over-brown. Use a foil strip wrapped around the pie rim, or add a pie shield, when the edges reach the right color.
Ways to Make Ina Garten Pie Crust Healthier
If you are watching your intake but still want pie, a few simple swaps can lighten things up. Here are some ideas:
- Swap half the shortening — Replace half the shortening with cold unsalted butter to reduce trans fats and add more flavor. This keeps the texture close to the original, but the crust may be slightly less flaky.
- Use whole wheat pastry flour — Substitute 1/2 cup of the all-purpose flour with whole wheat pastry flour. It adds fiber and a nutty flavor, but the pastry retains tenderness thanks to the lower protein content.
- Reduce the butter by one-quarter — Cut the butter to 6 tablespoons instead of a full stick. This reduces saturated fat by about 15 grams per serving, though the crust will be a little less rich.
- Go low-sodium — Use a salt-free butter and reduce the added kosher salt to 1/8 teaspoon. That cuts the sodium significantly, making it a better option for savory pies.
- Opt for a smaller portion — Split the dough into 6 smaller tart shells instead of one 9-inch pie. You reduce the fat per serving, and the crust-to-filling ratio stays satisfying.
Alternative Ingredients for Ina Garten Pie Crust
Sometimes you need to work with what is in the pantry. Here are substitutions that actually work.
- All-purpose flour → Gluten-free flour blend — Use 1 1/4 cups of a standard gluten-free baking mix that contains xanthan gum. The crust will be more crumbly but still works well for single-crust pies. Add 1 extra tablespoon of ice water.
- Cold unsalted butter → Cold salted butter — Use the same amount (1/2 cup) but reduce the added kosher salt to zero. The butter already contains enough salt for seasoning, and the texture remains identical.
- Cold vegetable shortening → Coconut oil — Replace the shortening with 1/4 cup cold coconut oil (solid, not melted). The crust will have a subtle coconut flavor, which pairs nicely with tropical fillings or curries.
- Apple cider vinegar → White vinegar — Use the same amount (1 tablespoon). White vinegar has a milder taste, so the crust will be slightly more neutral, but it still inhibits gluten effectively.
- Ice water → Cold milk — Replace the 3 tablespoons of ice water with cold whole milk. This adds a touch of richness and a golden color, but the crust will be slightly less tender.
- Kosher salt → Fine sea salt — Use 1/4 teaspoon fine sea salt (same volume). Sea salt dissolves more quickly, but it works identically in terms of seasoning and texture.
What to Serve With Ina Garten Pie Crust
This crust is a blank canvas, so the filling and accompaniments really matter. Here are some pairings that work beautifully.
- Classic apple pie filling — The tartness of Granny Smith apples pairs well with the buttery, flaky crust. A scoop of vanilla ice cream on top is optional but highly recommended.
- Rich chocolate cream filling — A creamy dark chocolate pudding filling (made with eggs, sugar, and cocoa) contrasts the crisp, salty-sweet crust. Top with whipped cream for a decadent finish.
- Savory mushroom and thyme quiche — The neutral crust is perfect for a quiche filling of sautéed mushrooms, Gruyère, and fresh thyme. The richness of the egg custard balances the flaky pastry.
- Fresh berry topping — For a lighter option, fill the baked shell with a mix of strawberries, blueberries, and raspberries macerated in a bit of honey and lemon juice. Serve immediately for a fresh, bright dessert.
- Warm custard pie — A simple vanilla custard (eggs, milk, sugar, and vanilla) baked in the crust is comfort in a slice. The creamy filling lets the flaky crust shine as the star.
- Honeyed fig and goat cheese tart — Layer fresh figs, crumbled goat cheese, and a drizzle of honey over the baked crust. The sweet and salty notes play off the buttery pastry beautifully.
Best Tips for Ina Garten Pie Crust
These are the non-obvious details that separate a good crust from a great one. Pay attention to them.
- Keep everything ice cold — Chill the bowl of the food processor, the blade, and even the flour in the freezer for 10 minutes before starting. Cold fats are essential for flaky layers — warm fats will melt into the flour and make the crust dense.
- Pulse, do not blend — Over-processing melts the fat and develops gluten. Restrict yourself to the specified pulse count: 8 to 10 times for the fats, then 10 seconds once the liquid is added. Stop the moment the dough clumps.
- Resist the urge to knead — When gathering the dough into a disc, use gentle pressure and a bench scraper to incorporate dry bits. Kneading develops gluten, which makes the crust tough and prone to shrinkage.
- Chill the dough overnight if possible — Four hours is the minimum, but overnight resting (12 to 24 hours) allows the flour to fully hydrate and the gluten to relax completely. The result is a more tender, easier-to-roll dough.
- Roll from the center outward, not back and forth — Rolling back and forth creates uneven thickness and can stretch the dough. Start from the center and roll outward, rotating a quarter-turn between each roll.
- Use the “thumb test” for doneness — After the second bake, press your thumb gently into the bottom of the crust. It should feel dry and firm, not soft or greasy. If it feels damp, bake for 5 more minutes.
- Let the crust cool completely before filling — A warm crust will melt certain fillings (like pastry cream) or make custards weep. Cool it on a wire rack for at least 30 minutes before adding anything.
Unique Takes on Ina Garten Pie Crust
Once you master the basic crust, you can experiment with these creative variations. Each one changes the flavor or texture in a pleasant way.
- Cheddar herb crust — Add 1/4 cup finely shredded sharp cheddar cheese and 1 tablespoon chopped fresh rosemary to the flour mixture before pulsing. The cheese adds savory umami, and the rosemary complements chicken or vegetable pot pies.
- Chocolate variation — Replace 2 tablespoons of the all-purpose flour with 2 tablespoons of unsweetened cocoa powder. This gives the crust a subtle chocolate flavor that works beautifully with cherry or raspberry fillings.
- Spiced version — Add 1/2 teaspoon cinnamon and 1/4 teaspoon nutmeg to the flour mixture. This is perfect for apple or sweet potato pies, where the warm spices enhance the filling.
- Lemon zest crust — Add the finely grated zest of one lemon to the flour mixture. The bright citrus note cuts through the richness of butter and pairs well with fruit fillings or lemon meringue pie.
- Nutty crust — Replace 1/4 cup of the all-purpose flour with finely ground toasted almonds or pecans. Toast the nuts first to bring out their oil, then pulse them with the flour. This adds texture and a toasty flavor.
- Sweetened crust — Add 1 tablespoon of granulated sugar to the flour mixture. This is a classic move for fruit pies, as the sugar caramelizes slightly during baking and adds a subtle sweetness that balances tart fruits.
How to Store Ina Garten Pie Crust
Proper storage keeps the crust fresh and ready to use. Here is what works best.
- At room temperature (baked) — Store the fully baked and cooled crust in a large airtight container or tightly wrapped in plastic wrap for up to 2 days. Keep it in a cool, dry place away from direct sunlight.
- In the refrigerator (unbaked dough) — Wrap the dough disc tightly in plastic wrap, then place it inside a zip-top bag. It will keep for up to 3 days. Let it sit at room temperature for 10 minutes before rolling.
- In the freezer (unbaked dough) — Wrap the disc in plastic wrap, then in a layer of aluminum foil to prevent freezer burn. It keeps for up to 3 months. Thaw overnight in the refrigerator before rolling.
- In the freezer (baked crust) — Cool the baked crust completely, then wrap tightly in foil and place in a freezer-safe bag. It freezes for up to 1 month. Reheat directly from frozen in a 350°F oven for 5 to 8 minutes to crisp.
How to Reheat Ina Garten Pie Crust
If the crust softens after storage, a quick reheat restores its crispness. Here are the best methods.
- In the oven — Place the baked, filled crust on a baking sheet and warm at 350°F / 177°C for 5 to 8 minutes. This is the most reliable method for restoring flakiness without over-browning the edges.
- On the stovetop (for individual slices) — Heat a dry non-stick skillet over medium heat. Place the slice of pie, crust-side down, and cook for 2 to 3 minutes until the crust is crisp and warm. Works best for single slices.
- In a toaster oven — Set the toaster oven to 350°F / 177°C and heat the crust directly on the rack for 3 to 5 minutes. Watch closely to prevent burning, especially if the crust is already golden.
- NOT in the microwave — The microwave will turn a perfectly good crust into a soggy, chewy mess. Avoid it entirely unless you are in a hurry and do not mind soft pastry.
FAQs
Can I freeze Ina Garten Pie Crust?
Yes, absolutely. Unbaked dough can be frozen for up to 3 months. Wrap it tightly in plastic wrap and foil, then thaw overnight in the fridge before rolling.
How long does Ina Garten Pie Crust last in the fridge?
Unbaked dough keeps in the refrigerator for up to 3 days. Baked crust lasts up to 2 days at room temperature if stored in an airtight container.
Can I make this crust gluten-free?
Yes. Swap the all-purpose flour for a 1:1 gluten-free baking mix that contains xanthan gum. Add 1 extra tablespoon of ice water to help the dough come together.
Why is my pie crust tough?
Tough crust is usually from overworking the dough or adding too much water. Pulse the fats only until the mixture resembles coarse meal, and add the water a little at a time. Avoid kneading during the shaping stage.
Can I use all butter instead of shortening?
You can use all butter (1 stick plus 1/4 cup more), but the crust will be less tender and may shrink more. Shortening has a higher melting point, which helps maintain flakiness. For best results, stick to the original ratio.
Do I really need to chill the dough for 4 hours?
Yes. The long chill time solidifies the fat, relaxes the gluten, and allows the flour to fully hydrate. Rushing this step leads to a tough, difficult-to-roll dough. Plan ahead.
Nutritional Breakdown (Per Serving)
Based on 1 serving = 1/4 of the recipe (one 9-inch pie shell made from this dough, or 4 servings).
- Calories: 485
- Protein: 5g
- Fat: 33g
- Saturated Fat: about 17g
- Carbohydrates: 39g
- Fiber: 1g
- Sugar: 0g
- Sodium: around 245mg
Conclusion
This Ina Garten Pie Crust is a reliable, flaky, and tender foundation for so many of my favorite pies. It takes a little planning with the chill time, but the results are always worth it. I hope you give it a try and find your own perfect filling to pair with it. Happy baking.
PrintIna Garten Pie Crust

This is Ina Garten’s classic, foolproof pie crust, yielding a golden, flaky, and tender pastry every time. The secret lies in using very cold butter and shortening, plus a touch of vinegar to inhibit gluten formation for a melt-in-your-mouth texture. Perfectly balanced with a hint of salt, this crust is ideal for both sweet and savory pies.
- Prep Time: 15
- Cook Time: 45
- Total Time: 420
- Yield: 4 1x
- Category: Dessert
- Method: Baking
- Cuisine: American
Ingredients
- 1 1/4 cups all-purpose flour, plus more for dusting
- 1/4 teaspoon kosher salt
- 1/2 cup (1 stick) cold unsalted butter, diced into 1/2-inch cubes
- 1/4 cup cold vegetable shortening, diced into 1/2-inch cubes
- 3 tablespoons ice water
- 1 tablespoon apple cider vinegar
Instructions
- Place 1 1/4 cups all-purpose flour and 1/4 teaspoon kosher salt in the bowl of a food processor fitted with the steel blade. Pulse 3 to 4 times to combine and aerate the flour — this ensures an even salt distribution and lighter texture.
- Add the cold diced butter and cold diced shortening to the food processor. Pulse 8 to 10 times, only until the mixture resembles coarse meal with some pea-sized butter pieces remaining. Do not over-process; those visible fat pieces create steam pockets during baking, which produce flaky layers.
- In a small bowl, combine 3 tablespoons ice water with 1 tablespoon apple cider vinegar; the vinegar helps prevent the gluten from overdeveloping, keeping the crust tender. With the food processor running, pour the water-vinegar mixture through the feed tube in a steady stream and process just until the dough begins to clump together, about 10 seconds. The dough should hold together when pinched but not form a ball.
- Turn the dough out onto a generously floured work surface. Gently gather the dough into a 5-inch disc, incorporating any dry bits with a bench scraper. Do not knead — overworking develops gluten and toughens the crust. Wrap the disc tightly in plastic wrap and refrigerate for at least 4 hours, or overnight. Chilling solidifies the fat, relaxes gluten, and allows the flour to fully hydrate, resulting in a more tender and workable dough.
- When ready to roll, preheat the oven to 375°F / 190°C. Remove the dough from the refrigerator; if it has chilled longer than 4 hours, let it sit at room temperature for 10 minutes to soften slightly for easier rolling.
- On a lightly floured surface, dust a rolling pin with flour. Roll the dough from the center outward, rotating the disc a quarter-turn after each roll to maintain a round shape. Continue rolling until the dough is about 12 inches in diameter and 1/8 inch thick. If the dough sticks, lift it gently with a bench scraper and add more flour underneath — tearing the dough can cause shrinkage during baking.
- Transfer the rolled dough to a 9-inch pie plate by rolling it loosely around the rolling pin, then unrolling over the dish. Gently press the dough into the bottom and up the sides without stretching. Trim the overhang to 1 inch beyond the rim, then fold the excess under itself to form a thick edge. Crimp the edge using your fingers (fluted style) or press with fork tines for a decorative finish.
- For a single-crust baked shell: Line the dough with a large piece of parchment paper (shiny side down), allowing it to drape over the edges. Fill the lined crust with pie weights, dried beans, or uncooked rice, spreading them up the sides to prevent the crust from slumping. Bake at 375°F / 190°C for 20 minutes until the edges begin to turn pale gold.
- Carefully remove the parchment and weights. Prick the bottom of the crust with a fork (dock) in several places to prevent air bubbles. Return the crust to the oven and bake for an additional 15 to 20 minutes, until the entire crust is golden brown and feels dry to the touch. If edges brown too quickly, tent with foil.
- Cool the baked crust completely in the pie plate on a wire rack before filling. For fillings that require further baking (like custards or fruit pies), the crust may be partially baked or filled raw per the recipe instructions — this technique provides a fully baked shell for no-bake fillings.
Notes
Storage: Baked crust can be stored at room temperature, covered, for up to 2 days. Unbaked dough: refrigerate up to 3 days, or freeze wrapped in plastic and foil for up to 3 months; thaw in refrigerator overnight before rolling. For reheating a pre-baked crust that has softened, place it in a 350°F / 177°C oven for 5 to 8 minutes to crisp.
Nutrition
- Calories: 485
- Sugar: 0g
- Sodium: 245mg
- Saturated Fat: 17g
- Carbohydrates: 39g
- Fiber: 1g
- Protein: 5g
- Cholesterol: 61mg
Keywords: Ina Garten pie crust, pie crust recipe, flaky pie dough, all-butter pie crust, classic pie crust, American dessert, baking, pastry, Thanksgiving pie, buttery pie crust