Ina Garten Vanilla Cake works surprisingly well on the stovetop, and the crumb stays tender and fine instead of damp or heavy. I keep coming back to this one for the rich butter flavor and that clear vanilla smell that hits as soon as you lift the lid. It takes 25 minutes to prep, 40 minutes to cook, and the method is all stovetop.
Ina Garten Vanilla Cake Overview
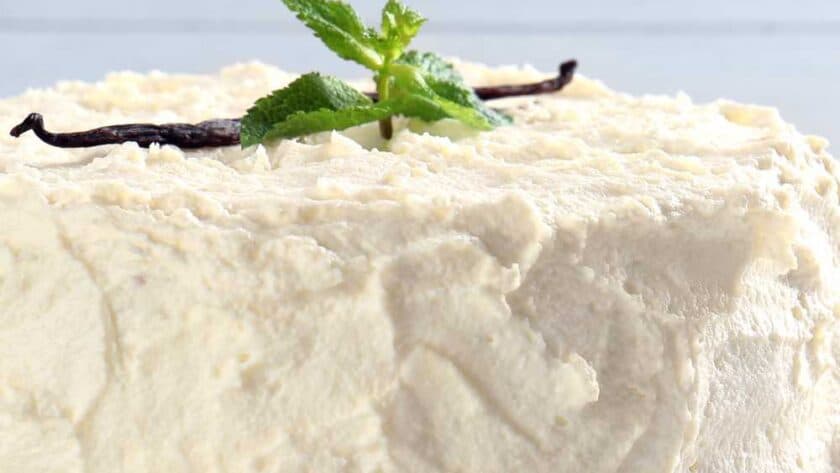
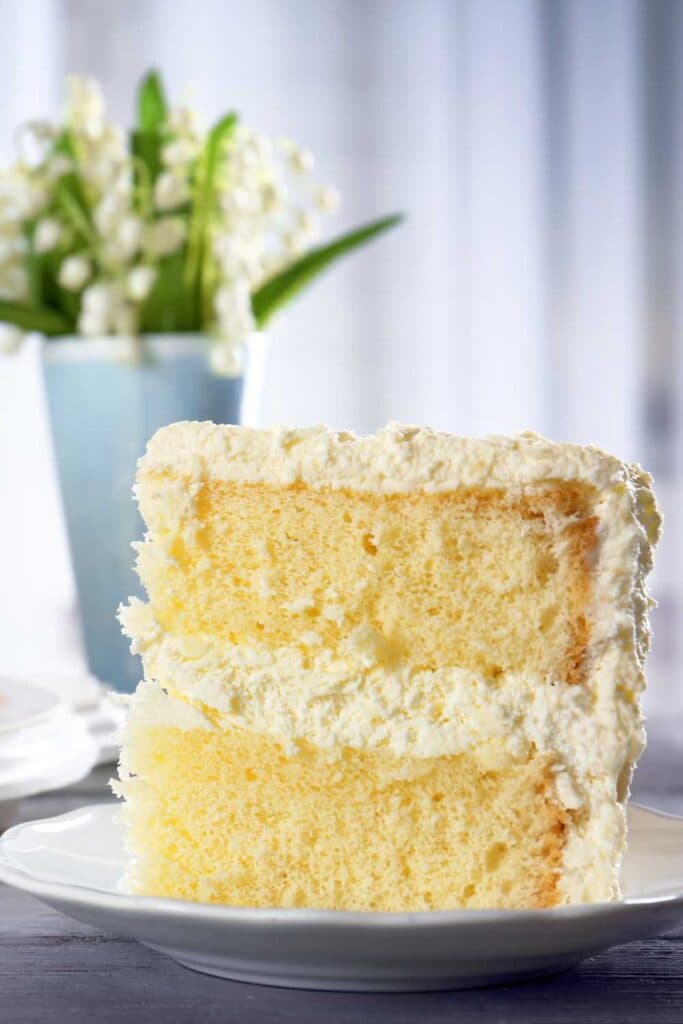
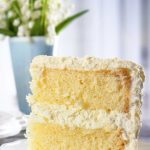
Ina Garten’s Vanilla Cake is a simple vanilla layer-style cake adapted here for stovetop cooking instead of a standard oven bake. The base is classic: butter, sugar, eggs, flour, milk, and plenty of vanilla, finished with a thin glaze that sets softly on top.
What makes this version stand out is the steaming method. You get a moist cake with a neat, even crumb, and the towel-wrapped lid keeps condensation from dripping back onto the surface, which matters more than most people think.
Why This Recipe is Worth Trying
- Stovetop method — This recipe gives you a real cake texture without turning on the oven, and the gentle steam keeps the crumb softer than you might expect.
- Butter-forward taste — With 6 tablespoons of unsalted butter, the flavor is rich but not heavy, which is exactly what I want from a plain vanilla cake.
- Balanced vanilla — The 2 teaspoons in the batter plus 1 teaspoon in the glaze give the cake a clear vanilla profile instead of that flat sweetness some simple cakes have.
- Small batch size — An 8-inch round cake serving 4 is useful when you want a proper homemade cake without leftovers hanging around all week.
- Clean finish — The glaze is thin, smooth, and easy to spoon over, so you get a polished top without fussing with frosting bags or extra layers.
- Reliable texture — If you cream the butter and sugar for the full 3 to 4 minutes, this Ina Garten Vanilla Cake comes out light and even every time I make it.
Ingredients You’ll Need for This Recipe
- All-purpose flour — 1 1/2 cups gives the cake its structure and keeps the crumb fine instead of overly airy.
- Baking powder — 1 1/2 teaspoons helps the batter rise evenly during the covered stovetop steaming.
- Baking soda — 1/4 teaspoon supports the lift and helps the texture stay balanced.
- Fine sea salt — 1/2 teaspoon sharpens the butter and vanilla flavors so the cake does not taste flat.
- Unsalted butter, softened — 6 tablespoons bring the main richness and cream properly with the sugar for a lighter batter.
- Granulated sugar — 3/4 cup sweetens the cake and helps create that pale, fluffy creamed base.
- Large eggs, room temperature — 2 eggs add structure, moisture, and help the batter emulsify smoothly.
- Pure vanilla extract — 2 teaspoons flavor the cake with a clear vanilla aroma that carries through after cooking.
- Whole milk, room temperature — 1/2 cup keeps the batter smooth and the finished cake moist.
- Powdered sugar, sifted — 1 cup makes a glaze that sits lightly over the top without feeling thick.
- Whole milk — 2 tablespoons loosen the glaze just enough so it pours in a soft ribbon.
- Pure vanilla extract — 1 teaspoon gives the glaze the same vanilla note as the cake underneath.
- Unsalted butter, melted — 1 tablespoon rounds out the glaze and gives it a smoother finish once set.
Useful Equipment
- 8-inch round cake pan — This is the exact pan size for the batter, so the cooking time stays on track.
- Large deep skillet, Dutch oven, or wide pot with lid — You need enough depth to hold the cake pan above the water and trap steam properly.
- Low rack or metal ring — Keeping the pan elevated prevents the bottom from cooking too hard against the hot base.
- Hand mixer — Creaming the butter and sugar for 3 to 4 minutes is much easier and more consistent with one.
- Offset spatula or spoon — Smoothing the top helps the cake cook level, which I think matters more in a covered pot than in an oven.
- Wire rack — Cooling the cake on a rack stops the bottom from getting damp after steaming.
Steps to Make Ina Garten Vanilla Cake
- Prepare the pan and pot — Lightly grease one 8-inch round cake pan, line the bottom with parchment, and set a large deep skillet, Dutch oven, or wide pot with a tight-fitting lid and a low rack or metal ring inside.
- Whisk the dry ingredients — In a medium bowl, whisk together 1 1/2 cups all-purpose flour, 1 1/2 tsp baking powder, 1/4 tsp baking soda, and 1/2 tsp fine sea salt for 30 seconds.
- Cream butter and sugar — In a separate bowl, beat 6 tbsp softened unsalted butter and 3/4 cup granulated sugar for 3 to 4 minutes until lighter in color and fluffy.
- Add eggs and vanilla — Beat in 2 large eggs one at a time, mixing well after each, then add 2 tsp pure vanilla extract.
- Alternate flour and milk — Mix in one-third of the flour mixture, then half of the 1/2 cup whole milk, then repeat and finish with the last third of flour, mixing on low just until combined.
- Fill the pan — Scrape the batter into the prepared pan, smooth the top, and tap the pan once or twice to release any large air bubbles.
- Steam the cake — Pour hot water into the pot to come about 1 inch up the sides below the rack, set in the pan, cover with the lid wrapped underneath with a clean kitchen towel, bring to a gentle simmer over medium-low heat, then reduce to low and steam for 35 to 40 minutes.
- Check for doneness — At 35 minutes, lift the lid straight up and look for a set top, a center that springs back lightly, and a toothpick that comes out clean or with a few dry crumbs.
- Cool before unmolding — Transfer the cake pan to a wire rack and let it rest for 10 minutes, then run a thin knife around the edge and turn it out.
- Make the glaze — Whisk together 1 cup sifted powdered sugar, 2 tbsp whole milk, 1 tsp pure vanilla extract, and 1 tbsp melted unsalted butter until smooth and pourable.
- Glaze the cake — Set the cake right side up and spoon the glaze over the top, then let it set for 15 minutes before slicing.
- Use the oven if needed — For an oven version, bake the same batter in the same pan at 350°F / 177°C for 25 to 30 minutes.
What Went Wrong and How I Fixed It
- Overmixing caused a tighter crumb — The batter got slightly heavy when I kept mixing after the flour went in, and stopping as soon as the streaks disappeared fixed that the next time.
- Cold ingredients made the batter look split — The butter mixture turned grainy when the eggs and milk were not at room temperature, and letting them sit out first brought everything together smoothly.
- Aggressive simmering made the cake cook unevenly — The bottom started setting too fast when the water bubbled hard, so I kept the heat on low with only a quiet simmer after that.
- Condensation spotted the top — Water dripped from the lid once and left damp marks, and wrapping the lid underneath with a clean kitchen towel solved it.
- Rushing the unmolding step cracked the edge — The cake was too soft straight from the pot, and giving it the full 10-minute rest made it release cleanly.
- Thin glaze slid straight off — Too much liquid made it runny, and whisking in a little more sifted powdered sugar brought it back to a thick ribbon.
Ways to Make Ina Garten Vanilla Cake Healthier
- Reduce the glaze — Use half of the prepared glaze instead of the full amount if you want less sugar while keeping the vanilla finish.
- Swap part of the flour — Replace 1/2 cup of the 1 1/2 cups all-purpose flour with 1/2 cup white whole wheat flour for a slightly heartier crumb.
- Cut back the sugar — Lower the 3/4 cup granulated sugar to 2/3 cup if you prefer a less sweet cake; the texture stays close, though the crumb is a bit less soft.
- Use less glaze butter — Change the 1 tbsp melted unsalted butter in the glaze to 2 teaspoons for a lighter finish.
- Serve smaller slices — Slice the cake into 6 pieces instead of 4 when you want to keep the same recipe but bring the calories per serving down.
Alternative Ingredients for Ina Garten Vanilla Cake
- Whole milk to buttermilk — Replace the 1/2 cup whole milk in the cake with 1/2 cup buttermilk for a slightly tangier flavor and a softer crumb.
- Pure vanilla extract to vanilla bean paste — Swap the 2 tsp in the batter and 1 tsp in the glaze with the same amount of paste for a deeper vanilla look and taste.
- Unsalted butter to salted butter — Use the same amount of salted butter and reduce the 1/2 tsp fine sea salt slightly, which gives the cake a sharper savory edge.
- All-purpose flour to cake flour — Replace the 1 1/2 cups all-purpose flour with 1 1/2 cups cake flour for a lighter, softer texture.
- Granulated sugar to caster sugar — Use 3/4 cup caster sugar instead for quicker creaming and a slightly finer crumb.
- Whole milk in glaze to cream — Swap the 2 tbsp whole milk for 2 tbsp cream if you want a richer glaze that sets a bit thicker.
What to Serve With Ina Garten Vanilla Cake
- Fresh berries — A spoonful of strawberries or raspberries cuts through the sweet glaze and works especially well with the vanilla base.
- Soft whipped cream — Lightly whipped cream adds volume without covering up the butter flavor of the cake.
- Hot coffee — I like this cake best with plain coffee because it balances the sugar and keeps the vanilla front and center.
- Black tea — Earl Grey or English breakfast pairs nicely when you want something less rich than a milky drink.
- Stewed fruit — Warm peaches or apples spooned over a slice make the cake feel a little more dessert-like without changing the recipe itself.
- Vanilla yogurt — A small side of yogurt gives a cool, tangy contrast that works well if you serve this at breakfast or brunch.
Best Tips for Ina Garten Vanilla Cake
- Cream long enough — Beat the butter and sugar for the full 3 to 4 minutes because that trapped air helps the stovetop cake rise properly.
- Keep ingredients room temperature — Eggs and milk blend into the batter more cleanly this way, which gives you a smoother crumb.
- Mix gently after flour — Low speed and short mixing matter here because too much stirring makes the finished cake firmer than it should be.
- Watch the water level — Keep the hot water about 1 inch up the sides and below the rack so the pan steams instead of sitting in water.
- Lift the lid straight up — Tilting it sends droplets onto the cake, and those wet spots can leave the top sticky.
- Test the center carefully — A springy middle and a toothpick with a few dry crumbs are better signs than color, since steamed cakes stay fairly pale.
- Let the glaze settle — Give it the full 15 minutes so it forms a delicate layer on top instead of disappearing into the warm crumb.
Unique Takes on Ina Garten Vanilla Cake
- Citrus version — Add 1 teaspoon finely grated lemon zest to the batter for a brighter cake that still keeps the vanilla profile intact.
- Almond note — Replace 1/2 teaspoon of the 2 teaspoons pure vanilla extract in the batter with 1/2 teaspoon almond extract for a bakery-style flavor.
- Jam layer — Split the cooled cake and spread 3 tablespoons raspberry jam in the middle before glazing the top for a simple filled version.
- Spiced finish — Stir 1/4 teaspoon ground cinnamon into the glaze if you want a warmer edge without changing the cake texture.
- Coconut twist — Replace 2 tablespoons of the whole milk in the glaze with 2 tablespoons canned coconut milk for a softer tropical note.
- Mini-cake approach — Divide the batter between two smaller greased pans and check earlier if you want thinner layers for stacking.
How to Store Ina Garten Vanilla Cake
- Counter storage — Keep the cooled glazed cake covered at room temperature for up to 2 days in a cake dome or airtight container.
- Refrigerator option — Store it covered in the refrigerator for up to 5 days so the glaze stays intact and the cake does not dry out.
- Freezer method — Wrap individual slices or the whole ungarnished cake tightly and freeze for up to 2 months.
- Thawing plan — Move the frozen cake to the refrigerator overnight so it defrosts evenly without turning damp on the outside.
- Before serving — Let refrigerated slices stand at room temperature for 20 to 30 minutes for the best texture and butter flavor.
How to Reheat Ina Garten Vanilla Cake
- Oven reheating — Warm unglazed slices in a 300°F oven for 5 to 7 minutes until just softened.
- Microwave option — Heat a slice on a microwave-safe plate for 10 to 15 seconds in a 900- to 1000-watt microwave, checking before it gets rubbery.
- Air fryer method — Reheat an unglazed slice at 300°F for 2 to 3 minutes, which works well when you want a quick warm center.
- Stovetop approach — Set a slice in a covered skillet over low heat for 2 to 3 minutes and watch for a gently softened texture without browning the bottom.
Nutritional Breakdown (Per Serving)
- Calories — about 521
- Protein — about 7.7g
- Fat — about 18.3g
- Carbohydrates — about 82.7g
- Fiber — about 1.0g
- Sugar — about 49.8g
- Sodium — about 285mg
FAQs
Can I bake Ina Garten’s Vanilla Cake in the oven instead of on the stovetop?
Yes. Bake the prepared batter in the same 8-inch round pan at 350°F / 177°C for 25 to 30 minutes, using the same doneness checks.
Why did my Ina Garten Vanilla Cake turn out dense?
This usually comes from under-creaming the butter and sugar or overmixing once the flour goes in. I stick closely to the 3 to 4 minute creaming time and mix on low just until combined.
Do I really need the towel around the lid?
Yes, I recommend it. It catches condensation so water does not drip onto the cake and leave wet spots on the top.
How do I know when the stovetop cake is done?
Check at 35 minutes. The top should look set, the center should spring back lightly, and a toothpick in the middle should come out clean or with a few dry crumbs.
Can I make Ina Garten Vanilla Cake ahead of time?
Yes, and it keeps well. Store the cooled cake covered at room temperature for up to 2 days or in the refrigerator for up to 5 days.
Can I freeze the cake with the glaze on it?
You can, but I prefer freezing it ungarnished. The notes for this recipe work best when you freeze individual slices or the whole ungarnished cake tightly wrapped for up to 2 months.
Conclusion
Ina Garten Vanilla Cake is one of those recipes that proves a plain vanilla cake can still be worth making from scratch. The stovetop method stays practical, and the texture comes out better than most people expect. If you want a small cake with a real butter-and-vanilla flavor, this one is easy to return to.
Try These Ina Garten Recipes
- Ina Garten Peach Blueberry Crumble
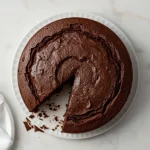
- Ina Garten’s German Chocolate Cake
- Ina Garten Lemon Icebox Cake
- Ina Garten Chocolate Mousse Cake
- Ina Garten Chocolate Fudge Cake
- Ina Garten Mexican Wedding Cookies
Ina Garten Vanilla Cake
This stovetop adaptation of a classic vanilla layer cake produces a tender, fine crumb with rich butter flavor and a pronounced vanilla aroma. The cake stays moist from whole milk and eggs, while a simple vanilla glaze keeps the finish elegant and true to the original profile.
- Prep Time: 25
- Cook Time: 40
- Total Time: 65
- Yield: 4 1x
- Category: Main Course
- Method: Stovetop
- Cuisine: International
Ingredients
For the cake:
- 1 1/2 cups all-purpose flour
- 1 1/2 tsp baking powder
- 1/4 tsp baking soda
- 1/2 tsp fine sea salt
- 6 tbsp unsalted butter, softened
- 3/4 cup granulated sugar
- 2 large eggs, room temperature
- 2 tsp pure vanilla extract
- 1/2 cup whole milk, room temperature
For the glaze:
- 1 cup powdered sugar, sifted
- 2 tbsp whole milk
- 1 tsp pure vanilla extract
- 1 tbsp unsalted butter, melted
Instructions
- Lightly grease one 8-inch round cake pan and line the bottom with a circle of parchment so the cake releases cleanly after steaming. Set a large deep skillet, Dutch oven, or wide pot on the counter with a tight-fitting lid and a low rack or metal ring inside; this keeps the cake pan elevated so the batter cooks evenly from trapped steam rather than direct contact with the hot base.
- In a medium bowl, whisk together the all-purpose flour, baking powder, baking soda, and fine sea salt for 30 seconds to distribute the leavening thoroughly. This step prevents tunneling and uneven rise, which can happen if baking powder pockets remain in the batter.
- In a separate mixing bowl, beat the softened butter and granulated sugar with a hand mixer for 3 to 4 minutes until noticeably lighter in color and fluffy in texture. Proper creaming traps air, which is especially important in a stovetop cake because you are relying on both mechanical aeration and chemical leavening for lift.
- Add the eggs one at a time, beating well after each addition until fully incorporated and smooth, then mix in the vanilla extract. If the mixture looks slightly curdled, do not panic; it will come back together once the flour and milk are added.
- Add one-third of the flour mixture to the butter mixture and mix on low speed just until the flour mostly disappears. Add half the milk, then repeat with another third of the flour, the remaining milk, and finally the last of the flour, mixing only until combined after each addition to avoid a tough cake from overdeveloped gluten.
- Scrape the batter into the prepared cake pan and smooth the top with a small offset spatula or the back of a spoon so it cooks level. Tap the pan once or twice on the counter to release any large trapped air bubbles, but do not overdo it or you will knock out the structure you just built.
- Pour enough hot water into the skillet or pot to come about 1 inch up the sides, keeping the water below the rack. Set the pan on the rack, cover the pot with the lid wrapped underneath with a clean kitchen towel to catch condensation, and cook over medium-low heat until you hear a gentle simmer; then reduce to low heat and steam the cake for 35 to 40 minutes, adjusting the heat as needed so the water stays at a quiet simmer and never boils aggressively.
- Check the cake at 35 minutes by briefly lifting the lid straight up so no water drips onto the surface. The cake is done when the top looks set, springs back lightly when touched in the center, and a toothpick inserted in the middle comes out clean or with a few dry crumbs; if the top is still wet or sticky, cover and cook 3 to 5 minutes longer.
- Transfer the cake pan to a wire rack and let it rest for 10 minutes before unmolding. Running a thin knife around the edge helps release the sides cleanly, and this short rest allows the crumb to firm up so the cake does not break while turning out.
- While the cake cools, whisk together the powdered sugar, whole milk, vanilla extract, and melted butter in a small bowl until smooth and pourable. If the glaze is too thick, add milk 1 teaspoon at a time; if too thin, add a little more sifted powdered sugar until it falls in a thick ribbon.
- Set the cake right side up on the rack or a serving plate and spoon the glaze over the top, letting it drip naturally toward the edges. Allow the glaze to set for 15 minutes before slicing so it forms a delicate finish rather than soaking straight into the crumb.
- For an oven alternative, bake the prepared batter in a preheated 350°F / 177°C oven for 25 to 30 minutes in the same 8-inch round pan. Use the same doneness cues: a lightly golden top, a springy center, and a clean toothpick from the middle.
Notes
Store the cooled glazed cake covered at room temperature for up to 2 days or in the refrigerator for up to 5 days. Freeze individual slices or the whole ungarnished cake, tightly wrapped, for up to 2 months; thaw overnight in the refrigerator. To serve from the refrigerator, let slices stand at room temperature for 20 to 30 minutes, or warm unglazed slices in a 300°F oven for 5 to 7 minutes until just softened.
Nutrition
- Calories: 521
- Sugar: 49.8g
- Sodium: 285mg
- Saturated Fat: 10.8g
- Carbohydrates: 82.7g
- Fiber: 1.0g
- Protein: 7.7g
- Cholesterol: 123mg