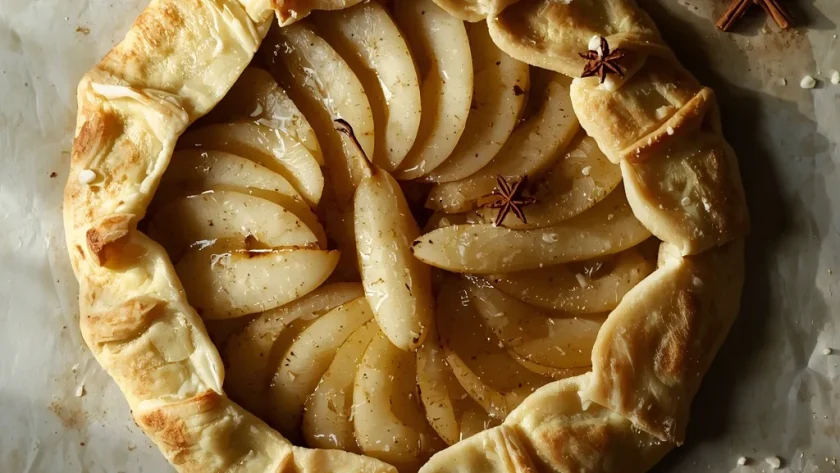
There’s a certain magic to a dessert that looks impressive but doesn’t demand perfection. That’s exactly what you get with an Ina Garten Pear Galette. With a flaky, buttery crust hugging tender, spiced pears, it’s a simple yet elegant finish to any meal. From prep to plate, it takes about an hour, making it a perfect last-minute treat for weeknights or a beautiful centerpiece for a dinner party.
This rustic French tart is forgiving by design. You don’t need a special pan or any fancy pastry skills. The free-form folds are part of its charm. The flavors are classic and comforting—sweet pears balanced with a hint of lemon and warm cinnamon. It’s the kind of dessert that feels special without being fussy.
Ina Garten Pear Galette Overview
At its heart, a galette is a rustic, open-faced tart. Its origins lie in French country cooking, where simplicity and good ingredients are paramount. What makes this version special is its straightforward approach to creating something truly delightful.
This dessert celebrates the pear in its prime. Bosc or Anjou pears hold their shape beautifully when baked. The crust recipe is a masterclass in simplicity, relying on cold butter and a light hand to achieve that coveted flaky texture. It’s the perfect project for a relaxed afternoon of baking.
Why This Recipe is Worth Trying
If you’re on the fence about making pastry, this is your gateway recipe. Here’s why it belongs in your rotation.
- Effortless Elegance — It looks like you spent hours, but the hands-on time is minimal. The rustic appearance is forgiving of any imperfect folds.
- Imperfection Welcome — Unlike a pie, there’s no lattice to weave or crimping to master. If the dough tears, just patch it. It’s supposed to look homemade.
- Seasonal Flexibility — While perfect for fall pears, the method works with almost any fruit you have on hand, from apples to peaches.
- Minimal Cleanup — You mix the dough, prep the filling, and bake it all on one parchment-lined sheet pan. Fewer dishes is always a win.
- Crowd-Pleasing Flavor — The combination of buttery crust, sweet fruit, and warm spice is universally loved. It pleases both simple and sophisticated palates.
Ingredients You’ll Need for This Recipe
This recipe uses pantry staples and a few fresh items. Quality matters most with the butter and fruit.
For the Crust
- All-Purpose Flour — Provides the structure. I don’t recommend swapping for whole wheat here, as it can make the crust dense.
- Kosher Salt — Enhances all the other flavors. If using table salt, use half the amount.
- Granulated Sugar — Just a teaspoon adds a subtle sweetness to the pastry itself.
- Cold Unsalted Butter — The key to flakiness. It must be cold and cubed. European-style butter with a higher fat content will yield an even richer crust.
- Ice Water — Binds the dough without melting the butter. The “ice” part is non-negotiable for keeping everything cold.
For the Filling
- Bosc or Anjou Pears — These varieties are ideal because they hold their shape and don’t turn mushy. Make sure they’re firm but ripe for the best texture.
- Granulated Sugar — Sweetens the pears and helps create a light syrup as they bake.
- Fresh Lemon Juice — Prevents the pears from browning and adds a necessary bright note to balance the sweetness.
- Ground Cinnamon & Nutmeg — The classic warm spices. Freshly grated nutmeg makes a noticeable difference if you have it.
- Unsalted Butter — Dotting the filling with butter adds incredible richness and promotes caramelization.
For Assembly
- Egg Wash (1 egg + 1 tbsp water) — This gives the crust its beautiful golden-brown shine.
- Coarse Sugar — Sprinkled on the crust for a delightful crunch and a hint of extra sweetness.
- Apricot Jam (Optional) — A quick glaze brushed on after baking adds a professional, glossy finish and a touch of flavor.
Useful Equipment
You likely have most of these tools already. Here’s what makes the process smoother.
- Food Processor — The easiest, fastest way to make a flaky pie dough. A pastry blender and a large bowl work fine, but require more effort.
- Rolling Pin — Essential for getting the dough to that 12-inch circle. A wine bottle can work in a pinch.
- Parchment Paper — Non-negotiable for easy rolling and transfer, and it prevents sticking to the baking sheet.
- Pastry Brush — For applying the egg wash evenly. A clean, new paintbrush from a hardware store is a surprising but effective alternative.
- Rimmed Baking Sheet — Contains any potential juices that bubble out during baking, saving your oven from a mess.
Steps to Make Ina Garten Pear Galette
The process is broken down into three simple phases: making the dough, prepping the filling, and assembling. Just take it one step at a time.
- Prepare the Dough — Pulse the flour, salt, and sugar in a food processor. This quick mix ensures everything is evenly distributed from the start.
- Cut in the Butter — Add the cold butter cubes and pulse until the mixture looks like coarse crumbs with visible butter pieces. Those pea-sized bits are your ticket to flakiness.
- Add Ice Water — Drizzle in 3 tablespoons of ice water while pulsing. Add the last tablespoon only if needed, and stop as soon as the dough clumps. Overprocessing is the enemy of a tender crust.
- Chill the Dough — Shape the dough into a disk, wrap it tightly, and refrigerate for at least an hour. This step firms the butter and relaxes the gluten, making the dough much easier to roll.
- Prepare the Filling — Toss the sliced pears with sugar, lemon juice, cinnamon, and nutmeg. The lemon juice is crucial here to keep the pears from oxidizing and turning brown.
- Roll Out the Dough — On a floured surface, roll the chilled dough into a 12-inch circle. Don’t stress about perfect edges. If it cracks, just press it back together.
- Assemble the Galette — Transfer the dough to a parchment-lined baking sheet. Arrange the pears in the center, leaving a 2-inch border, and dot with the tablespoon of butter.
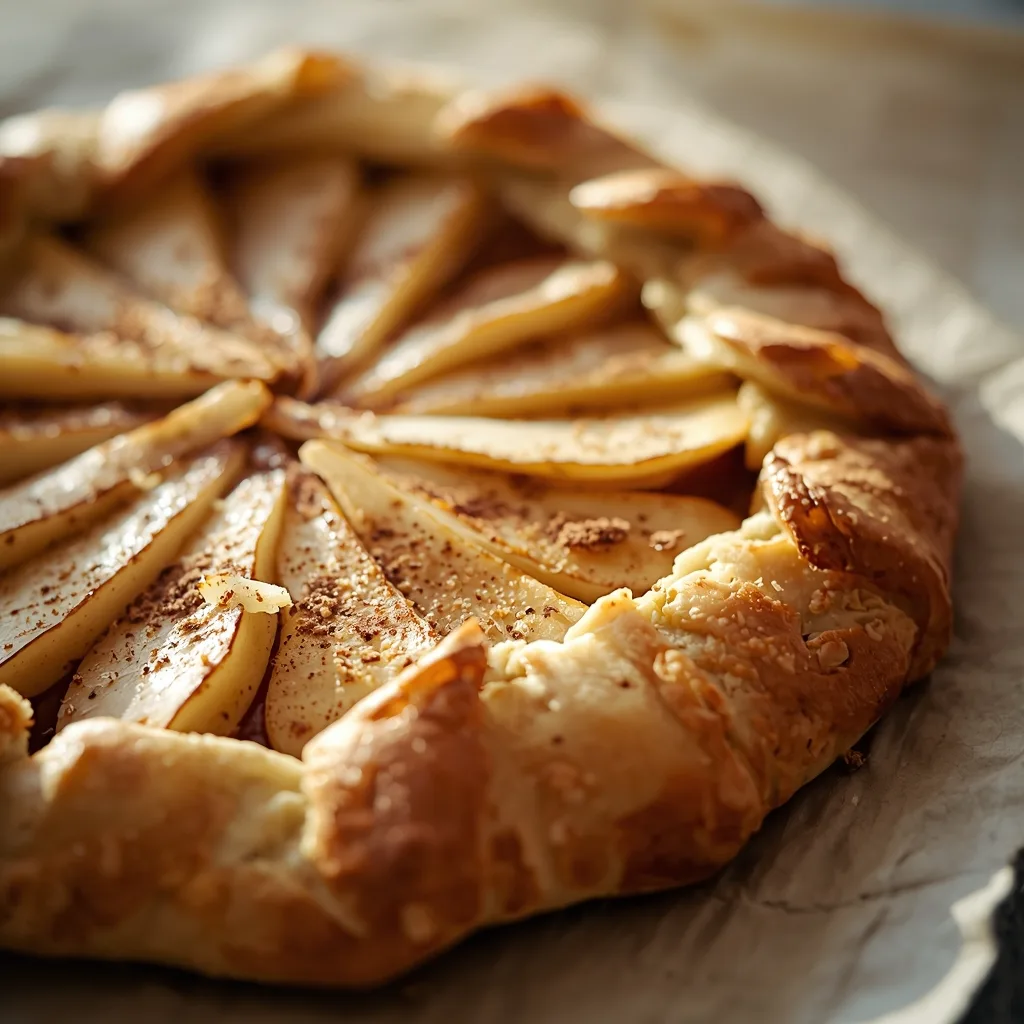
- Fold the Edges — Gently fold the dough border over the pears, pleating as you go. It should look rustic and free-form. Press lightly to seal any gaps.
- Apply Egg Wash & Sugar — Brush the folded dough with the egg wash and sprinkle generously with coarse sugar. This creates that beautiful, crunchy, golden finish.
- Bake — Bake at 400°F for 30-35 minutes, until the crust is deep golden and the pears are tender. Rotating the pan halfway through ensures even browning.
- Glaze (Optional) — If using, warm the apricot jam with a teaspoon of water and brush it over the baked pears while the galette is still warm. This adds a lovely sheen.
- Cool and Serve — Let it cool on the pan for 10 minutes to set before slicing. Serving it warm is ideal, but room temperature is also delicious.
What Went Wrong and How I Fixed It
I’ve made my share of mistakes with pastry. Here are the common pitfalls and how to avoid them.
- Soggy Bottom Crust — This happens if the butter wasn’t cold enough or the oven wasn’t hot enough. Ensure your butter is straight from the fridge and preheat your oven fully.
- Tough, Chewy Dough — Overmixing is almost always the culprit. When adding water, pulse just until the dough holds together when pinched.
- Excessively Runny Filling — Slicing the pears too thin or skipping the chilling step can release too much juice. Use a 1/4-inch slice and let the filled galette sit for 10 minutes before baking to help set the crust.
- Butter Leaking Out — If your butter pieces were too large or warm, they can melt out. Make sure to cube the butter to 1/2-inch pieces and keep everything cold.
- Crust Shrinks Dramatically — Not chilling the dough long enough is the reason. The gluten needs time to relax. A full hour in the fridge is the minimum.
Ways to Make Ina Garten Pear Galette Healthier
If you’re looking for a lighter version, a few simple swaps can make a difference without sacrificing flavor.
- Reduce Added Sugar — Cut the sugar in the filling by half. Ripe pears are naturally quite sweet, so you may not miss it.
- Choose Whole Grains — Substitute half of the all-purpose flour with whole wheat pastry flour. It adds fiber and a nutty flavor while keeping the crust tender.
- Skip the Egg Wash — For a vegan version or to save calories, brush the crust with a bit of almond milk or a simple syrup instead of the egg wash.
- Boost the Fiber — Add a tablespoon of ground flaxseed or chia seeds to the dry ingredients for the crust. You won’t taste them, but they add nutritional value.
Alternative Ingredients for Ina Garten Pear Galette
Don’t let a missing ingredient stop you. These swaps work beautifully.
- All-Purpose Flour → Gluten-Free Flour Blend — Use a 1:1 gluten-free baking blend. Add 1/4 teaspoon of xanthan gum if your blend doesn’t include it, to help bind the dough.
- Bosc Pears → Firm Apples — Granny Smith or Honeycrisp apples are excellent substitutes. Use the same quantity, sliced to the same thickness.
- Granulated Sugar → Coconut Sugar or Maple Syrup — For a deeper flavor, use coconut sugar. If using maple syrup in the filling, reduce the lemon juice by half to account for the extra liquid.
- Ground Cinnamon → Apple Pie Spice — A teaspoon of apple pie spice can replace the cinnamon and nutmeg for a more complex spice profile.
- Apricot Jam → Honey or Maple Syrup — For the optional glaze, simply warm a tablespoon of honey or maple syrup and brush it on for a similar glossy effect.
What to Serve With Ina Garten Pear Galette
This dessert is wonderful on its own, but a simple accompaniment makes it feel complete.
- Vanilla Ice Cream — The classic pairing. The cold, creamy ice cream melting into the warm tart is pure comfort.
- Whipped Cream — A dollop of freshly whipped cream, barely sweetened, adds a light and airy contrast.
- Sharp Cheddar Cheese — A small slice of aged cheddar on the side is a fantastic, slightly savory counterpoint to the sweet pears.
- Custard or Crème Anglaise — For a more elegant presentation, serve a pool of vanilla custard under or alongside each slice.
- Afternoon Tea or Coffee — A cup of Earl Grey tea or a strong black coffee cuts the sweetness perfectly and makes for a lovely afternoon treat.
Best Tips for Ina Garten Pear Galette
A few insights from my kitchen can help ensure your success on the first try.
- Keep Everything Cold — Chill your butter, use ice water, and refrigerate the dough disk. A cold dough equals a flaky crust.
- Uniform Pear Slices — Try to slice the pears to an even 1/4-inch thickness. This ensures they all cook at the same rate.
- Don’t Overfill — It’s tempting to use all the pears, but a single layer is key. Extra fruit releases too much juice and can make the bottom soggy.
- Use Parchment Paper — Rolling the dough directly onto floured parchment makes transferring it to the baking sheet foolproof.
- Let it Rest Before Slicing — Those 10 minutes of cooling on the pan are essential for the juices to thicken slightly, so your slices hold their shape.
- Test Pear Doneness — Don’t just rely on color. Pierce the thickest pear slice with the tip of a knife. It should slide in with no resistance.
Unique Takes on Ina Garten Pear Galette
Once you’ve mastered the basic version, try one of these fun twists.
- Ginger-Pear Variation — Add a teaspoon of finely grated fresh ginger or 1/2 teaspoon of ground ginger to the pear filling for a spicy kick.
- Almond Frangipane Base — Spread a thin layer of almond frangipane (a mix of almond paste, butter, and egg) on the dough before adding the pears for a rich, marzipan-like layer.
- Salty-Sweet Upgrade — Sprinkle a pinch of flaky sea salt over the galette as soon as it comes out of the oven. It intensifies all the flavors.
- Add Crunch with Nuts — Sprinkle a handful of chopped pecans, walnuts, or sliced almonds over the pears before folding the crust.
- Cheese-Infused Crust — Add 1/4 cup of finely grated Parmesan or sharp cheddar to the dry ingredients for the crust for a savory-sweet delight.
How to Store Ina Garten Pear Galette
Proper storage keeps your leftovers tasting great. Here’s how to handle them.
- Room Temperature (Short Term) — Keep it on the counter, loosely covered with a clean kitchen towel, for up to one day. The crust will soften but still be tasty.
- Refrigerator Storage — Once completely cool, wrap the galette tightly in plastic wrap or store in an airtight container. It will keep for up to 3 days.
- Freezing Before Baking — Assemble the galette but don’t apply the egg wash. Freeze it solid on the parchment-lined sheet, then wrap tightly in plastic and foil. Bake directly from frozen, adding 5-10 minutes to the bake time.
- Freezing After Baking — Let the baked galette cool completely, then wrap it tightly in several layers of plastic wrap and foil. It can be frozen for up to 3 months.
How to Reheat Ina Garten Pear Galette
Reheating is the best way to recapture that freshly-baked texture.
- Oven Method (Best) — Preheat your oven to 350°F. Place slices or the whole galette on a parchment-lined sheet and warm for 10-15 minutes. This revives the crust’s crispness.
- Toaster Oven — This is perfect for a single slice. Use the same 350°F temperature and heat for 5-8 minutes, watching closely to prevent over-browning.
- Air Fryer — Reheat a slice at 320°F for 3-4 minutes. The circulating air does a great job of crisping the crust quickly.
FAQs
Can I make the dough for Ina Garten Pear Galette ahead of time?
Absolutely. The dough disk can be refrigerated for up to 2 days, or frozen for up to 3 months. Thaw frozen dough overnight in the fridge before rolling.
Can I use frozen pears?
I don’t recommend it. Frozen pears release a tremendous amount of water when thawed, which will almost guarantee a soggy crust. Fresh, firm pears are essential for this recipe.
Why is my galette leaking juice everywhere?
A little bubbling is normal, but a flood usually means the pears were sliced too thin or there were too many layers. Stick to a single layer of 1/4-inch slices and let the filling sit for a few minutes before baking to macerate.
How long does Ina Garten Pear Galette last in the fridge?
Stored properly in an airtight container, it will keep well for about 3 days. The crust will soften, but reheating it in the oven will help restore some texture.
Can I freeze Ina Garten Pear Galette?
Yes, you can freeze it either before or after baking. For best results, freeze after baking and cooling completely. Thaw in the refrigerator overnight and reheat in the oven.
Is this dessert suitable for beginners?
Yes, it’s one of the best beginner-friendly pastry projects. The rustic style is forgiving, and the steps are straightforward. It builds confidence for more intricate pies and tarts.
Nutritional Breakdown (Per Serving)
Based on 1 serving, which is one-quarter of the galette.
- Calories: 530
- Protein: 6g
- Fat: 28g
- Carbohydrates: 66g
- Fiber: Around 5g
- Sugar: 28g
- Sodium: Roughly 60mg
Conclusion
This dessert proves that impressive baking doesn’t require complexity. With its flaky crust and spiced fruit filling, an Ina Garten Pear Galette is a testament to the beauty of simple, good ingredients. I hope this guide gives you the confidence to try it. Gather your pears and butter—your new favorite rustic tart is waiting to be made.
PrintIna Garten Pear Galette

This rustic pear galette features a flaky, buttery crust enveloping tender, spiced pears. With a hint of lemon and cinnamon, it’s a simple yet elegant dessert perfect for any occasion.
- Prep Time: 25
- Cook Time: 35
- Total Time: 60
- Yield: 4 1x
- Category: Dessert
- Method: Baking
- Cuisine: French
Ingredients
- For the crust:
- 1 1/4 cups all-purpose flour
- 1/4 teaspoon kosher salt
- 1 teaspoon granulated sugar
- 1/2 cup (1 stick) cold unsalted butter, cut into 1/2-inch cubes
- 3–4 tablespoons ice water
- For the filling:
- 3 medium Bosc or Anjou pears, peeled, cored, and sliced 1/4-inch thick
- 1/4 cup granulated sugar
- 1 tablespoon freshly squeezed lemon juice
- 1/2 teaspoon ground cinnamon
- 1/4 teaspoon ground nutmeg
- 1 tablespoon unsalted butter, cut into small pieces
- For assembly:
- 1 large egg, beaten with 1 tablespoon water for egg wash
- 1 tablespoon coarse sugar for sprinkling
- Optional: 1 tablespoon apricot jam, warmed with 1 teaspoon water for glazing
Instructions
- Prepare the dough: In a food processor fitted with the steel blade, combine the flour, kosher salt, and granulated sugar. Pulse 2-3 times to aerate and mix evenly. This ensures the salt and sugar are distributed, preventing uneven seasoning in the crust.
- Add the cold butter cubes to the food processor. Pulse in 1-second bursts until the mixture resembles coarse crumbs with some pea-sized butter pieces remaining. Keeping the butter cold is crucial for a flaky crust, as it creates steam pockets during baking.
- Drizzle 3 tablespoons of ice water over the mixture while pulsing. Pulse just until the dough begins to clump together; if it seems dry, add the remaining tablespoon of water. Overmixing can develop gluten, leading to a tough crust, so stop as soon as it holds together.
- Turn the dough onto a sheet of plastic wrap. Gently press and shape it into a 1-inch thick disk, then wrap tightly. Refrigerate for at least 1 hour, or up to 2 days. Chilling relaxes the gluten and firms the butter, making the dough easier to roll and ensuring it holds its shape during baking.
- Prepare the filling: While the dough chills, peel, core, and slice the pears into uniform 1/4-inch thick slices. In a large bowl, toss the pear slices with granulated sugar, lemon juice, cinnamon, and nutmeg until evenly coated. The lemon juice prevents browning and adds brightness, balancing the sweetness.
- Roll out the dough: On a lightly floured surface, roll the chilled dough into a 12-inch circle about 1/8-inch thick. Use a rolling pin and rotate the dough occasionally to prevent sticking and maintain an even shape. If the dough cracks, patch it with your fingers; it’s rustic, so perfection isn’t necessary.
- Transfer the rolled dough to a parchment-lined baking sheet. Leaving a 2-inch border, arrange the pear slices in concentric circles or a single layer on the dough. Dot the top with the tablespoon of butter pieces. The butter will melt and caramelize, enhancing the flavor and texture.
- Fold the edges: Gently fold the dough edges over the filling, pleating every 2-3 inches to create a rustic, free-form tart. Press lightly to seal any cracks. This contains the juices and gives the galette its characteristic appearance.
- Apply the egg wash: In a small bowl, beat the egg with 1 tablespoon water until smooth. Use a pastry brush to lightly coat the folded dough edges with the egg wash, then sprinkle evenly with coarse sugar. The egg wash promotes browning and adds shine, while the sugar provides a subtle crunch.
- Bake the galette: Preheat the oven to 400°F / 204°C. Bake the galette on the middle rack for 30-35 minutes, rotating the sheet halfway through, until the crust is deeply golden brown and the pears are tender when pierced with a knife. The high heat ensures a crisp crust and properly cooked filling.
- Glaze (optional): If using apricot jam, warm it with 1 teaspoon water in a small saucepan over low heat until liquefied. Brush the glaze over the pears while the galette is still warm. This adds a glossy finish and extra sweetness, but it’s optional for a more natural look.
- Cool and serve: Allow the galette to cool on the baking sheet for 10 minutes to set, then transfer to a wire rack to cool slightly. Serve warm or at room temperature, ideally within a few hours for the best texture. Cooling prevents the filling from being too runny when sliced.
Notes
Store leftover galette covered in the refrigerator for up to 3 days. To freeze, wrap tightly in plastic wrap and aluminum foil, then freeze for up to 3 months. Reheat in a preheated 350°F / 177°C oven for 10-15 minutes until warmed through, which revives the crust’s crispness without overcooking.
Nutrition
- Calories: 530
- Sugar: 28g
- Sodium: 60mg
- Saturated Fat: 16g
- Carbohydrates: 66g
- Fiber: 5g
- Protein: 6g
- Cholesterol: 115mg
Keywords: pear galette, galette recipe, French dessert, rustic tart, pear tart, easy dessert, holiday baking, fruit pastry, buttery crust, spiced pears, Ina Garten inspired